Interactive prototypes are vital in modern UI-UX design, bridging the gap between conceptual ideas and tangible products. These models enable creators to build an accurate representation of the final item, allowing those involved and potential users to engage with the design prior to its creation.
By offering a hands-on experience, interactive prototypes help in validating design choices, ensuring that the end product aligns with user expectations. Mastering this skill in Figma not only enhances design efficiency but also improves communication among team members, leading to a more polished final product.
Understanding Prototypes: Interactive vs. Non-Interactive
Defining Prototypes:
Interactive Prototypes: These prototypes are dynamic, allowing users to click, scroll, and interact as they would with a live application. They simulate real user interactions and are extremely useful for usability testing.
Non-Interactive Prototypes: These are static representations, often used in the early stages of design. They lack clickable elements and serve more as visual aids to convey the basic layout and design elements.
Why the Difference Matters:
Understanding the distinction between interactive and non-interactive prototypes is crucial. Interactive prototypes offer a more engrossing experience, making them more suitable for testing and feedback purposes. In contrast, non-interactive prototypes are simpler but limited in their ability to simulate real-world interactions.

Hobbo I UX & UI Case Study by Kaarwan student_©Nilima Tiwari on Behance.net
What is an Interaction Prototype?
An interaction prototype is a type of interactive prototype that focuses specifically on the user interactions within a design. It models how users will interact with different elements, such as buttons, menus, and forms, providing a detailed view of the user journey.
This type of prototype is essential for testing and refining user interactions before development begins. By replicating real user behavior, interaction prototypes help designers identify potential issues and optimize the overall user experience.
The Importance of Interactive Prototypes in UI-UX Design
Key Benefits:
Early Detection of Usability Issues: Interactive prototypes allow designers to identify and address usability issues early in the design process, saving time and resources.
Enhanced Stakeholder Communication: These prototypes provide a clear and tangible representation of the final product, making it easier to communicate design concepts to stakeholders.
User-Centric Design: By testing prototypes with real users, designers can gather valuable feedback and make informed decisions that enhance the overall user experience.
Interactive prototypes are indispensable tools for creating user-centered designs that resonate with the target audience.
Why Choose Figma for Prototyping?
Figma stands out as a premier tool for prototyping, especially for teams working in UI-UX design. Its cloud-based nature allows for real-time collaboration, enabling multiple users to work on the same project simultaneously. Figma’s intuitive interface and powerful prototyping features make it accessible to both beginners and experienced designers.
Additionally, Figma supports a wide range of design elements, interactions, and animations, making it versatile enough to handle projects of varying complexity. These features make Figma an ideal choice for anyone looking to create high-quality interactive prototypes.
Overview of Figma's Prototyping Capabilities
Key Features:
Smart Animate: Allows for smooth transitions between different states, making interactions feel natural and fluid.
Interactive Components: Enables the creation of reusable components that maintain their interactions across different screens, saving time and ensuring consistency.
Triggers and Actions: Offers a variety of triggers (e.g., clicks, hovers) and actions (e.g., transitions, overlays) to define how users interact with the design.
Figma’s robust prototyping capabilities empower designers to create complex and highly interactive prototypes that closely mimic the final product, enhancing the overall design process.
Getting Started with Figma: Setting Up Your Project
Initial Steps:
Create a New File: Start by creating a new file in Figma and setting up your workspace.
Organize Design Elements: Group related design elements logically to keep your workspace clean and organized.
Set Up Frames: Begin by setting up frames that represent the different screens or states in your design.
Starting your project in Figma with a clear and organized approach is crucial. This initial setup will pave the way for a smoother prototyping process, allowing you to focus on creating a seamless user experience.
Designing Your First Frame in Figma
Key Considerations:
Frame Size: Choose an compatible frame size based on the device or screen you’re designing for.
Visual Hierarchy: Establish a clear visual hierarchy to guide users through the interface, ensuring that important elements stand out.
UI Elements: Carefully arrange UI elements, such as buttons, text, and images, to create an intuitive and user-friendly layout.
Designing your first frame in Figma is a foundational step. It sets the tone for the rest of your project and provides a framework within which you’ll build your interactive prototype.
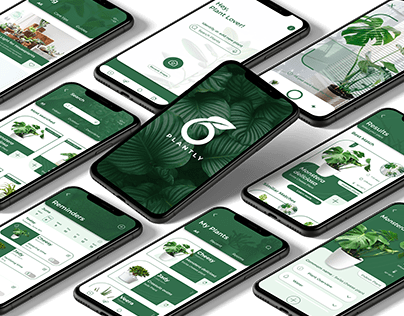
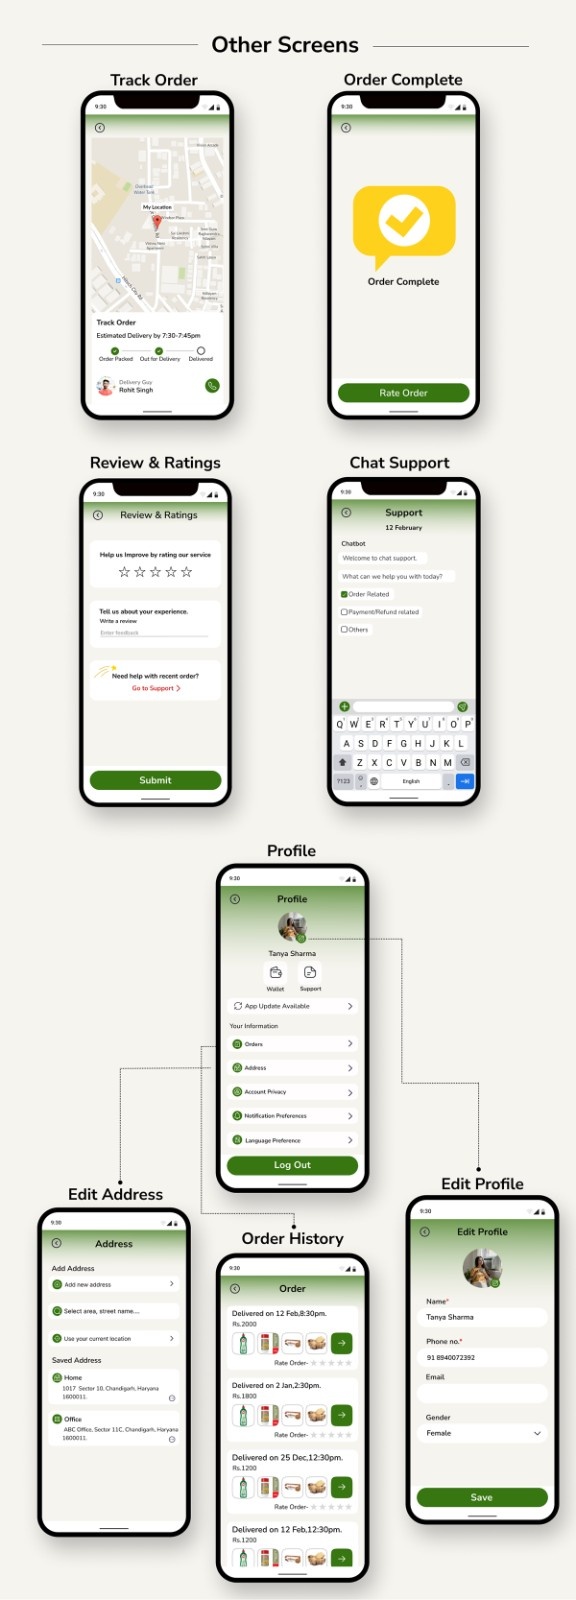
PLANTLY- Plant Care App by Kaarwan student_©radhika vijay on Behance.net
Creating Static Designs Before Prototyping
Before diving into the interactive aspects, it’s essential to create static designs that represent the key screens and states of your application. Pay attention to the design aspects that are seen, making sure they are uniform throughout different devices.
Focus on the visual design elements, ensuring homogeneity across screens. This step is critical as it lays the groundwork for building a functional and cohesive prototype, making the subsequent steps in the prototyping process much smoother.
Building Interactive Prototypes in Figma: Step-by-Step Guide
Step-by-Step Process:
Link Frames: Start by linking your static frames to create a basic user flow.
Define Interactions: Use Figma’s prototyping tools to define how elements like buttons and menus interact. This could include adding transitions, animations, or changes in state.
Test and Refine: Preview the prototype to ensure that interactions are smooth and intuitive. Make adjustments as needed.
Building an interactive prototype in Figma involves connecting the dots between your static designs and adding the necessary interactions to simulate real user behavior. The aim is to develop a prototype that provides a smooth and believable experience for the user.
Utilizing Figma's Interactive Components
Advantages of Interactive Components:
Consistency: Interactive components ensure that elements like buttons and menus behave consistently across different screens.
Efficiency: By reusing components, you save time and reduce the likelihood of errors or inconsistencies in your design.
Scalability: Interactive components make it easier to scale your design, especially in large projects where consistency is key.
Figma’s interactive components feature is a powerful tool for creating efficient, consistent, and scalable prototypes. It allows you to maintain design integrity while streamlining the prototyping process.
Adding Micro-Interactions to Enhance User Experience
What are Micro-Interactions?
Micro-interactions are small, subtle animations or responses that occur in reaction to user actions. They are essential in improving the user experience by making the interface seem more responsive and easier to use.
Examples:
Button Hover Effects: Changing the color or appearance of a button when hovered over.
Loading Animations: Indicating that an action is in progress, such as when submitting a form.
By adding small, interactive elements to your Figma model, you can develop a design that is both more captivating and easier to use. These small details can make a big difference in how users perceive and interact with your interface.
Testing Interactive Prototypes: Best Practices
Best Practices for Testing:
Conduct Usability Tests: Test your prototype with real users to gather feedback on its usability and effectiveness.
Simulate Real-World Scenarios: Ensure that the prototype mimics real-world usage as closely as possible, including various user scenarios and edge cases.
Iterate Based on Feedback: Use the insights gained from testing to make necessary adjustments and improvements to the prototype.
Initiating the evaluation of your interactive prototype is an essential phase in the design journey. It helps you identify and address any issues before the design goes into development, ensuring a smoother transition from prototype to final product.
User Testing: Gathering Feedback from Prototypes
How to Conduct User Testing:
Share the Prototype: Use Figma’s sharing features to distribute the prototype to users for testing.
Monitor User Engagement: Observe how users engage with the prototype, identifying any challenges or points of confusion.
Collect Feedback: Gather both quantitative and qualitative feedback from users to understand their experience and identify areas for improvement.
User testing is invaluable for refining your interactive prototype. By gathering feedback from real users, you gain insights that can lead to significant improvements in the design, ultimately resulting in a better user experience.
GroceryGo app by Kaarwan student_©Dia Lalwani on Behance.net
Iterating on Your Prototype Based on Feedback
Steps for Iteration:
Review Feedback: Carefully review the feedback collected during user testing, identifying key areas that need improvement.
Implement Changes: Make the necessary adjustments to the prototype, whether it’s tweaking interactions, refining the layout, or improving the visual design.
Test Again: After making changes, conduct another round of testing to ensure that the improvements have addressed the issues identified.
Refinement through iteration plays a key role in the design journey. By constantly improving your model through the input of users, you guarantee that the ultimate offering is both sleek and easy to use.
Advanced Prototyping Techniques in Figma
Exploring Advanced Features:
Smart Animate: Use this feature to create smooth transitions between different states, enhancing the realism of your prototype.
Custom Animations: Create unique animations tailored to your design, adding a layer of sophistication to your prototype.
Interactive Overlays: Utilize overlays to simulate pop-ups, drop-downs, and other UI elements that enhance interactivity.
Advanced prototyping techniques in Figma allow you to push the boundaries of what’s possible in a prototype, creating a more immersive and interactive experience for users.
The Role of Animation in Interactive Prototyping
Benefits of Animation:
Guiding User Attention: Animations can draw attention to key elements, helping users navigate the interface more easily.
Providing Feedback: Animations can indicate when an action has been successfully completed, improving the user’s understanding of the interface.
Enhancing Aesthetics: Well-designed animations add a level of polish and professionalism to your prototype, making it more visually appealing.
Adding animation to your interactive models can greatly improve the user experience by making the interface more captivating, easy to understand, and visually lively.
Exporting and Sharing Your Figma Prototype
How to Export and Share:
Export Assets: Use Figma’s export features to save your design assets in the appropriate formats for development.
Share Links: Generate shareable links to your prototype, allowing stakeholders and team members to view and interact with the design.
Provide Documentation: Include detailed documentation to guide developers in implementing the design accurately.
Exporting and sharing your Figma prototype is the final step in the prototyping process. It ensures that your design is ready for the next stage of development and that all stakeholders are aligned.
Conclusion
Mastering interactive prototyping in Figma is a game-changer for UI-UX designers. By transforming static designs into dynamic experiences, you bridge the gap between concept and reality, ensuring alignment with user expectations. Remember, prototypes are not just visual aids but powerful tools for communication, testing, and iteration.
Start by defining clear goals, leverage Figma's features effectively, and prioritize user-centric design. Continuously test, refine, and iterate based on feedback. With dedication and practice, you'll create exceptional user experiences that leave a lasting impact.
Transform your design skills with our in-depth UI-UX Design Certification Course. Learn to craft exceptional user experiences through interactive prototyping, usability testing, and design thinking. Gain hands-on experience with Figma and build a strong design portfolio. Enroll today!
Visit the Kaarwan website for more insights!