Within the digital design world, 3D modeling is recognized as a powerful instrument for change. At the heart of this method is the employment of meshes, acting as the base for complex and detailed 3D models. Meshes are collections of vertices, edges, and faces that define the shape and form of objects within a digital space.
Understanding and mastering meshes can elevate the quality of your designs, especially when utilizing advanced software like Grasshopper, which seamlessly integrates with Rhino. This article delves into how you can enhance your 3D modeling skills by working effectively with meshes in Grasshopper.
The Importance of Meshes in 3D Modeling
Meshes are crucial in 3D modeling because they allow designers to define and manipulate the surface geometry of objects with precision. This precision is particularly important in fields such as architecture, product design, and animation, where the visual and structural integrity of models is paramount.
When working with meshes, you can control the level of detail, texture, and overall shape of your models, which directly impacts the final outcome of your design projects. Meshes also provide flexibility, enabling you to experiment with various forms and structures, which is essential in parametric design architecture.
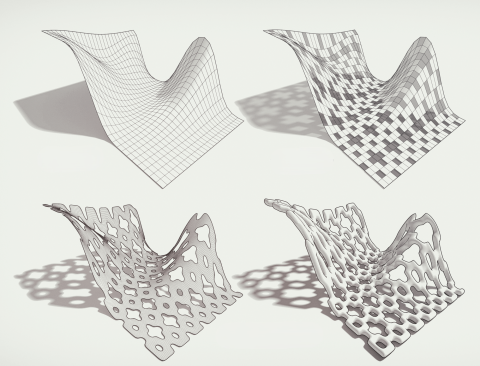
Image source - static.food4rhino.com
Getting Started: What is a Mesh in 3D Modeling?
A mesh in 3D modeling consists of a network of vertices, edges, and faces. These elements work together to define the surface of a 3D object. The vertices act as points in space, edges connect these points, and faces fill the spaces between the edges, typically forming triangles or quadrilaterals.
In Grasshopper, meshes are a fundamental component for creating both simple and complex models. By understanding how meshes are constructed, you can begin to manipulate and refine them to suit your design needs.
Creating a Basic Mesh in Grasshopper
To create a basic mesh in Grasshopper, start by constructing a grid of points. You can do this using the 'Construct Point' component. Once you have your grid, use the 'Mesh from Points' component to connect these points into a mesh.
This basic mesh forms the foundation for further refinement. Grasshopper offers a range of tools for editing meshes, such as 'Mesh Edit' or 'Mesh Surface', which allow you to modify the mesh's topology, add detail, or change its overall shape. This process is essential for building more complex designs.
Advanced Mesh Techniques in Grasshopper
Once you’ve mastered the basics, you can explore advanced techniques to push the boundaries of your designs. Grasshopper allows you to apply parametric controls to your meshes, enabling real-time adjustments based on external inputs or constraints.
For instance, you can use sliders or attractor points to dynamically alter the structure of your mesh, allowing for rapid exploration of different design possibilities. Additionally, plugins like Mesh+ expand Grasshopper's capabilities, offering tools for subdividing meshes, creating intricate patterns, and applying various deformations.
Benefits of Advanced Techniques:
Greater Design Flexibility: Parametric controls allow for easy adjustments, making your design process more flexible.
Increased Detail and Complexity: Advanced techniques enable you to add more detail and complexity to your models.
Efficient Exploration: Real-time adjustments make it easier to explore multiple design options quickly.
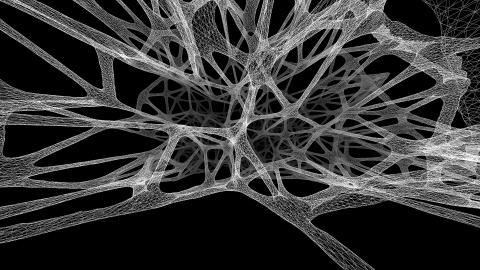
Image source - static.food4rhino.com
Optimizing Mesh Quality for Parametric Design
In parametric design architecture, mesh quality is of utmost importance. A high-quality mesh ensures that your model not only looks good, but also functions as intended. In Grasshopper, you can optimize mesh quality by controlling the resolution and ensuring uniform face sizes. Tools like 'Remesh' and 'Weld Mesh' are invaluable in this process.
They help refine the mesh topology, ensuring that the vertices, edges, and faces are evenly distributed. By optimizing your meshes, you enhance both the aesthetic and structural integrity of your models, making them more suitable for practical applications.
Key Optimization Techniques:
Control Resolution: Adjust the resolution of your mesh to balance detail and performance.
Uniform Face Sizes: Ensure that the faces of your mesh are evenly sized to prevent distortions.
Refine Topology: Use tools like 'Remesh' to improve the distribution of vertices and edges.
The Power of Rhino and Grasshopper Together
The synergy between Rhino and Grasshopper makes them a formidable combination for mesh modeling. Rhino’s powerful NURBS-based engine excels at refining the shape and surface of models, while Grasshopper’s parametric tools allow for the exploration of complex geometries.
This combination is particularly useful for architects and designers who need to iterate quickly and efficiently. By using Rhino and Grasshopper together, you can achieve innovative designs that are both aesthetically pleasing and structurally sound.
Enhancing Mesh Creation with Mesh+ Plugin
The Mesh+ plugin for Grasshopper is a game-changer for anyone serious about mesh modeling. It extends Grasshopper’s native capabilities by adding advanced tools for mesh manipulation. Installing Mesh+ is straightforward. Download the plugin from the Food4Rhino website, then copy the files to Grasshopper’s components folder within the Rhino directory.
After restarting Rhino, you’ll have access to new components that significantly enhance your ability to create and edit meshes. Mesh+ features tools for subdividing meshes, creating complex patterns, and applying various deformations, all of which can take your designs to the next level.
Advantages of Mesh+ Plugin:
Subdividing Meshes: Increase mesh resolution for more detailed models.
Complex Patterns: Create intricate designs that would be difficult with standard tools.
Deformation Tools: Apply deformations to create more organic shapes and structures.
Practical Applications of Meshes in Architecture
In parametric design architecture, meshes are invaluable for exploring a wide range of forms and structures. Architects often use meshes to create complex facades or optimize structural elements. For example, a mesh can be used to design a building facade with intricate patterns that are both visually appealing and functional.
Real-World Examples:
Facade Design: Using meshes to create intricate, functional patterns for building facades.
Structural Optimization: Applying meshes to optimize the structure of a building, reducing material use while maintaining strength.
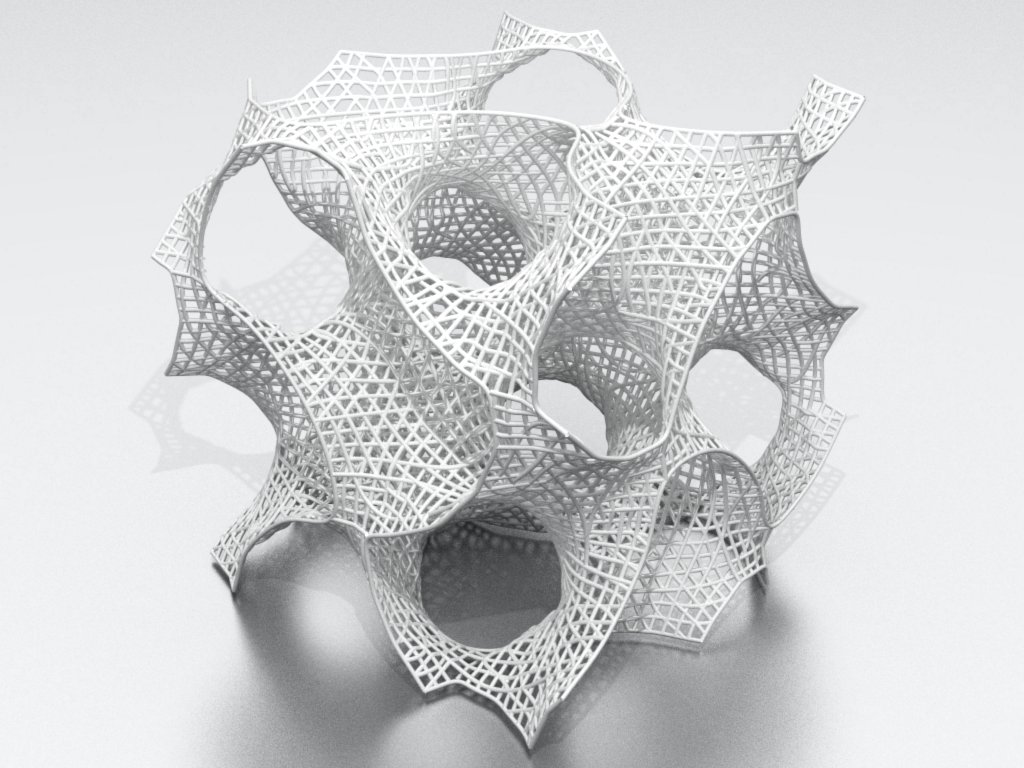
Image source - blogger.googleusercontent.com
Common Challenges in Mesh Modeling
While meshes are powerful, they can present challenges, particularly in complex models. Tools like 'Mesh Repair' can identify and fix issues, ensuring that your meshes remain clean and functional throughout the design process.
Overcoming Common Challenges:
Mesh Topology Issues: Use 'Mesh Repair' to fix non-manifold edges or degenerate faces.
Managing Mesh Density: Keep mesh density under control to ensure performance and ease of editing.
Regular Maintenance: Regularly check and clean your meshes to avoid issues later in the process.
Best Practices for Working with Meshes
To achieve the best results when working with meshes in Grasshopper, follow these best practices.
Start with a Clean Mesh: A well-defined mesh is easier to work with and less prone to errors.
Keep Topology Simple: Avoid unnecessary complexity in your mesh topology.
Use Parametric Controls: Manage complexity with parametric controls to simplify adjustments.
Conclusion
Mastering meshes in Grasshopper opens up a world of possibilities in 3D modeling. Whether you're creating complex architectural designs or intricate product models, understanding how to create, manipulate, and optimize meshes is essential. By following best practices, utilizing advanced techniques, and leveraging powerful tools like Mesh+, you can significantly enhance the quality and efficiency of your designs. As you continue to explore and refine your skills, the potential for innovation in your work will only grow, solidifying your place at the forefront of digital design.
FAQs: Common Questions About Meshes in Grasshopper
Q.1 How to Make a Mesh in Grasshopper?
Creating a mesh in Grasshopper involves constructing a grid of points and then connecting these points into a mesh using the 'Mesh from Points' component. This basic mesh can then be refined using various tools to suit your design needs.
Q.2 How to Install Mesh+ in Grasshopper?
To install the Mesh+ plugin, download it from the Food4Rhino website. Copy the downloaded files into the Grasshopper components folder within the Rhino directory. After restarting Rhino, the new components will be available in Grasshopper.
Q.3 Where Does Mesh Explode in Grasshopper?
Mesh explosions typically occur due to issues with mesh topology, such as overlapping vertices or faces. Use the 'Mesh Repair' component to identify and fix these issues.
Q.4 How to Convert an Object to Mesh?
Convert an object to a mesh in Grasshopper using the 'Mesh Brep' component. This tool converts a Brep (a boundary representation) into a mesh, allowing for adjustments to the mesh's density and quality.
Q.5 What is Mesh 3D Modeling?
Mesh 3D modeling is the process of creating 3D models using a network of vertices, edges, and faces. This method allows for precise control over the shape, texture, and resolution of 3D objects.
Elevate your designs! Enroll in our Advance Rhino & Grasshopper Certification Course today. Master 3D modeling with expert techniques. Transform your architectural skills now!
Visit the Kaarwan website for more insights!